In this lesson, we will learn about
- The Welcome Screen
- The Workspace
- The Workspace Areas in Expert Mode
- Customizing the Workspace Background Color
- How to Create a New Blank Layout
- Setting Layout View, Zoom In/Out, Rulers, Grids, and Guides
- Use Window to Personalize Your Workspace
- Layers Demystified
- Creating a New Layout Using a Template
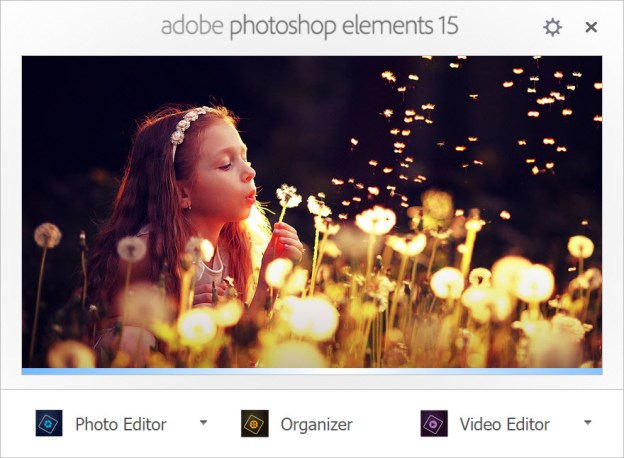
Welcome Screen
When you first start Photoshop Elements (PSE), the welcome screen opens by default. When making scrapbook layouts we will be working the Photo Editor> Expert mode. From the welcome screen click the Photo Editor icon to open the editor.
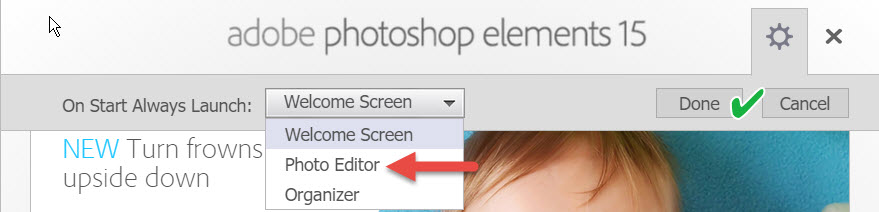
Use the Settings icon (gear) to the left of the Close (X) button to set which application is started each time you start PSE. If this is not set the Welcome Screen will open each time PSE starts.
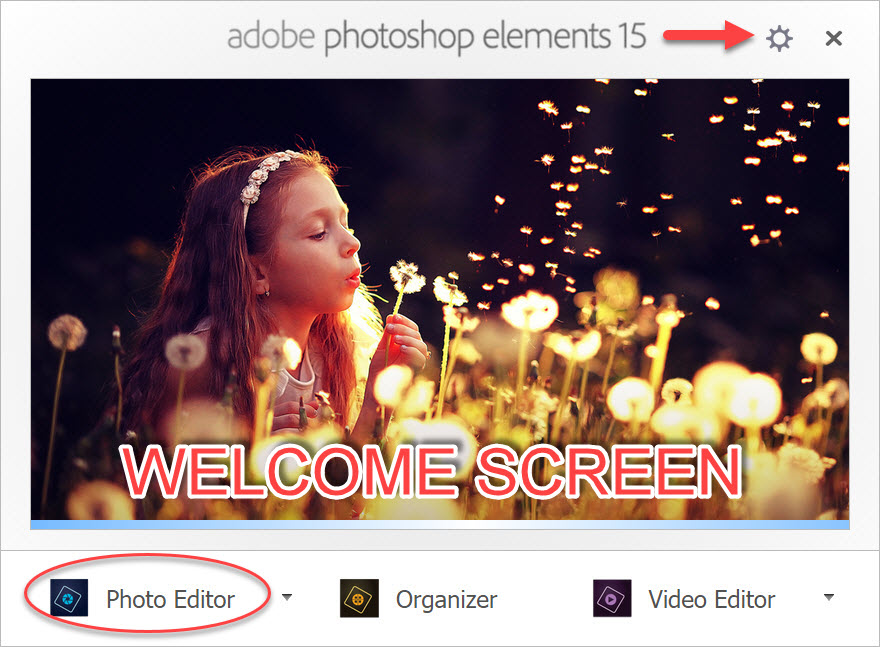
Choose Photo Editor> check Done. The next time PSE is opened it will go directly to the photo editor.
Adobe Security and Privacy Settings
You will also be given the option to share information with Adobe about how you use the program. Choose “click here” to set preferences.
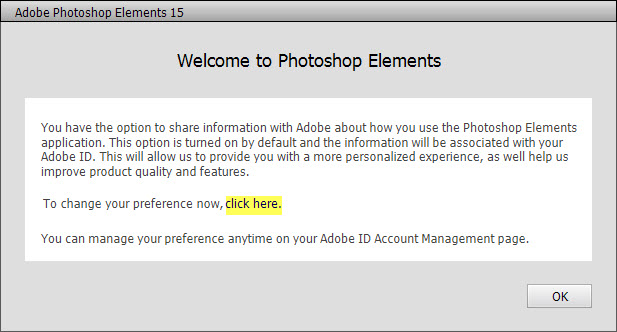
This will take you to the Security & Privacy area of your Adobe account.

Set preferences here.

The Workspace – Menu Bar
There are several parts of the workspace you need to be familiar with. At the very top of the screen is the Menu bar which contains menus for performing tasks. We’ll learn more about each task later.

The Workspace Areas in Expert Mode
At the top of the workspace, in the Options bar (D), the Mode selector indicates we’re working in Expert mode.
The active tab (A) is highlighted and the active image (C) is displayed. Other tabs (B) show other papers/images that are open but not active. On the left, the Toolbox (E) contain the tools used for editing and adding elements to your image/layout. The area below the active image (F) toggles between the Photo Bin and Tool Options for a selected tool. The Taskbar (G) at the very bottom displays frequently used actions for quick/easy access. The Panel Bar (H) groups effects, layers, styles, actions, graphics, or other controls.
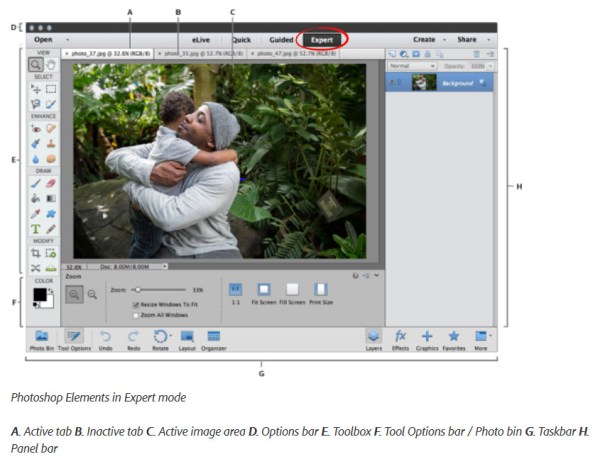
- A. Active tab indicates the tab that is currently active.
- B. Other tabs that are open but not currently active.
- C. The active image area.
- D. Options bar contains mode selector (Quick, Guided, Expert), Open & Create.
- E. The Toolbox contains tools used for editing your image/layout.
- F. Toggles between Photo Bin (display/manage thumbnails of currently used image) & Tool Options (display/set options for currently selected tool).
- G. Taskbar displays frequently used actions as buttons for quick/easy access.
- H. Panel Bar groups effects, layers, actions, features, or controls.
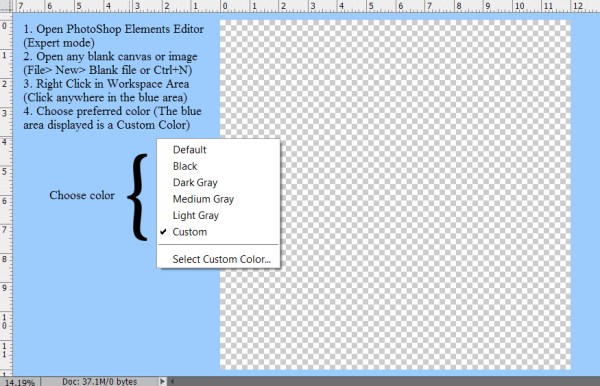
Customizing the Workspace Background Color
The background color in the active image area can easily be changed from default gray to any color to match your preference. The blue in the image below is a Custom Color selected using Select Custom Color…
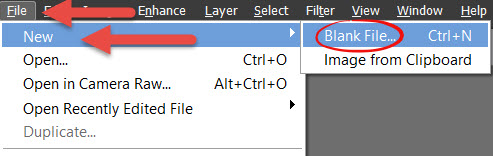
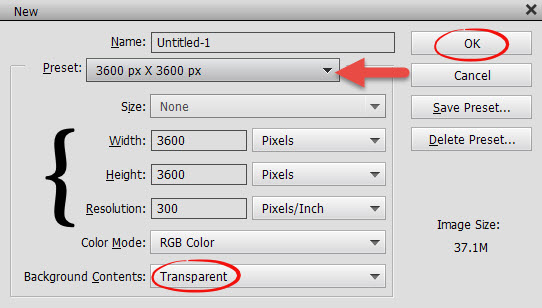
How to Create a New Blank Layout
Steps to start a New blank layout – File> New> Blank File or Ctrl+N
There are several Preset sizes and you can also create a custom size & save it. A standard scrapbook layout page is 3600 pixels by 3600 pixels, resolution 300 pixels per inch with a transparent background. Verify these settings then click OK.
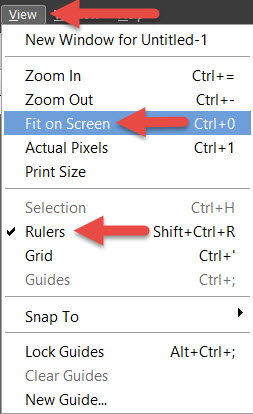
Setting Layout View, Zoom In/Out, Rulers, Grids, and Guides
Use View on the Menu bar to change the layout view to Fit on Screen, Rulers, Grids, etc. You can also use it to Zoom In & Out or use Ctrl +/- or the scroll wheel on your mouse to zoom. If you’ve scrolled in or out you can also double-click the Hand tool in the Tool box to quickly Fit to Screen again.
Use Window to Personalize Your Workspace
Use Window on the Menu bar to see Tools on the left and Effect & Layers in the Panel Bin. Simply check the items you want to see such as Tools, Panel Bin, Layers, Effects, etc. If you ever “lose sight” of Tools or Panel Bin, check Window to make sure they haven’t been un-checked accidentally.

Layers Demystified
Layers can be confusing at first but they’re really easy. Think of a layer as a glass slide (like under a microscope type slide). All of the slides are the same size, the size set earlier was 12″ x 12″ (3600 px x 3600 px). As a layout is developed each paper, element, or text added goes on a separate glass slide (layer). Since they’re transparent you can see through each layer to the layers below. The slides (layers) are stacked one upon another to develop the final layout. The stack can be rearranged by dragging a layer(s) up or down in the stack.
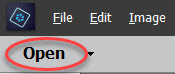
Creating a New Layout Using a Template
Creating a new layout using a template is slightly different. Instead of using File> New, as in a new blank layout, drop just below File to Open. Click Open
Locate the template you’ve saved on your computer> Click Open.
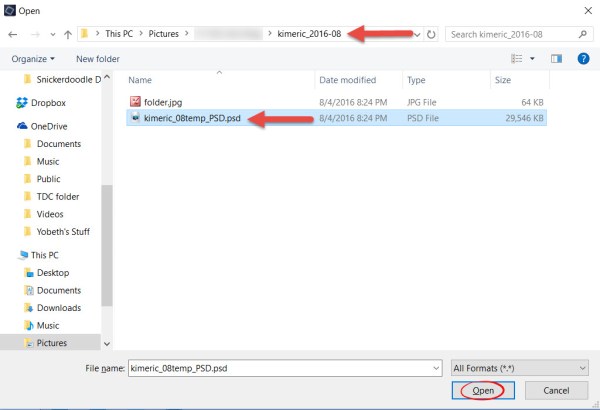
Notice the Layers Panel is already populated. You can choose to use all or part of the layers included in the template. They can be rearranged or changed just like any layer.
Note: the Template pictured is Kimeric Kreations Facebook Fan freebie from August 2016.

This lesson covered a lot! It is intended to familiarize you with the Photoshop Elements workspace. We’ll look at creating layouts with and without templates in our next tutorials.
I hope you find the tutorial helpful. If you have a question or comment please let me know.
Download PDF
