Category Archives: Tutorial

Photo Spill Frame or Out of Bounds?

Photo Spill Frame or Out of Bounds?  I’ve had several people ask me the difference between them.  I believe the difference is in the precision.  A Photo Spill Frame is out of bounds but an Out of Bounds effect is not necessarily a Photo Spill Frame!  Let me elaborate.

The “bounds” I’m speaking of is the photo’s frame.  So Out of Bounds is a technique where the photo is not contained within the boundaries of the frame.

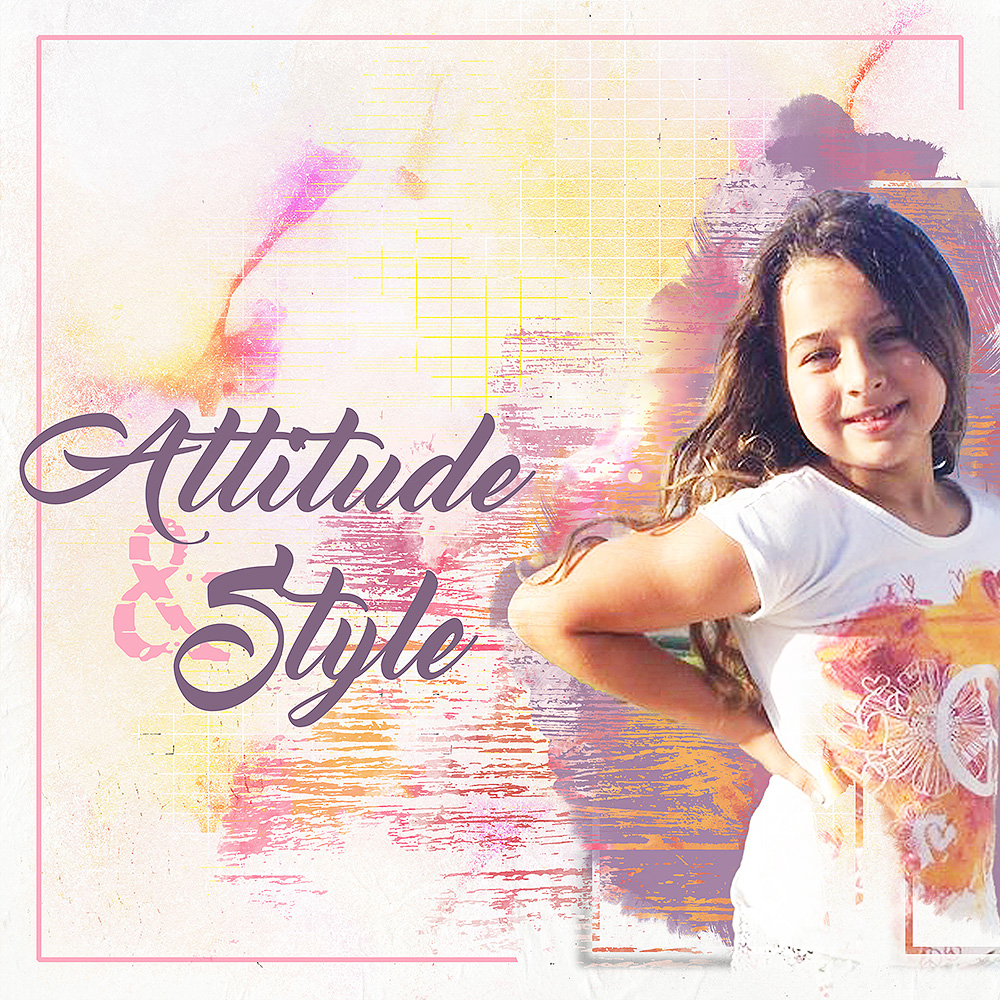
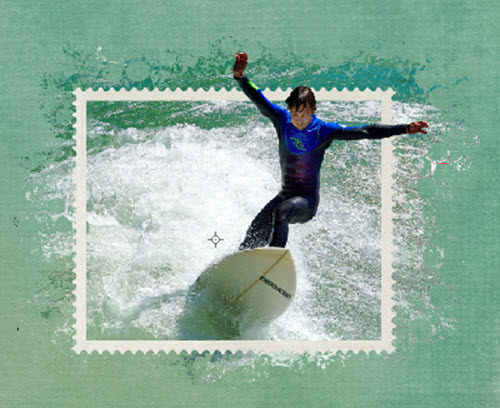
When I think of the Out of Bounds effect I think about arms, hands, heads, leaves, or something similar extending outside of the frame.  Here are a couple of examples of what I mean when I talk about an Out of Bounds effect.   The surfer’s arms and head extend beyond the frame in the first example.  In the second example, the woman’s feet are out of bounds.


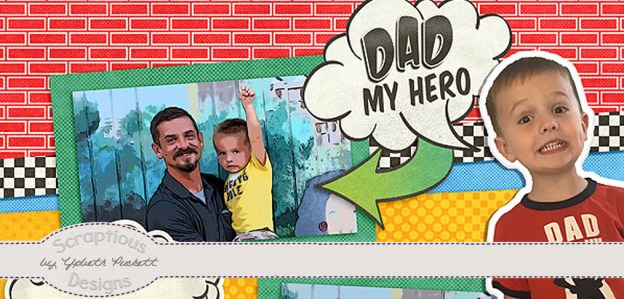
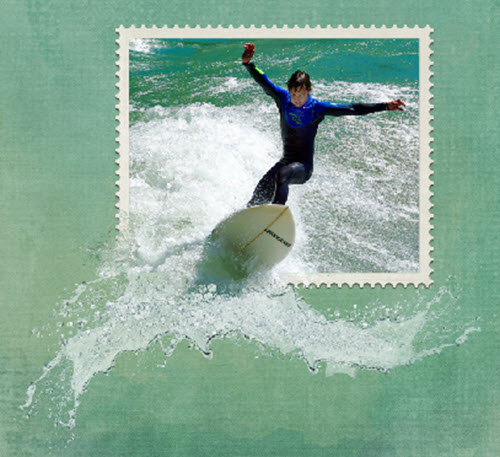
A Photo Spill Frame effect makes me think of something spilling out over the frame.  While it’s still technically an out of bounds effect it’s not as precise as the examples above.  Water and waves are perfect subjects for this effect but not the only possibilities.  Consider anything that can, well, spill or overflow.  The technique I use in each case is also different.  Here are a couple of examples.  I used the surfer photo again for the first Photo Spill Frame example to see the difference in the two effects on the same photo.  I also added a wave element here.

Here’s an example of a different type of Photo Spill.  As you can see it’s larger & less precise.


If you’d like to find out how to create a layout using the Photo Spill Frame effect using Photoshop Elements check out my tutorial, How to Create a Photo Spill Frame Effect.  I hope you will enjoy and use this effect in some of your layouts.  What ideas do you have for other items that can spill over the edge of the frame?  Please comment and share your ideas.


Credits:  The layout examples were created using various elements from the following kits:

A Day at the Beach, Everyday Stories-Home, and Kraft Party by Kimeric Kreations.

Funny Pages and Superheroes

If you have kids or grandkids of a certain age they probably love superheroes.  And people of all ages love the Sunday funny pages.  Am I right?  If this sounds appealing to you take a look at my tutorial on Scrapaneers blog about combining these into a cool layout using Photoshop Elements.  You can check it out here.

Here’s another layout based on the same tutorial but using a different kit.  I used the same photos and cut out but a different layout design and kit.

Kit: Super Heroes  http://www.thedigichick.com/shop/Super-Heroes.html

Designer: Magical Scraps Galore

Sticker Action: Wendyzine Scraps

Using Extractions and Blend Modes in Photoshop Elements 15

If using extractions and blend modes in Photoshop Elements is still a bit of a mystery to you check out my tutorial here.  The more I see and use artistic effects the more I love them.  In this tutorial, I take you through my process step by step.  So follow along and add your own tricks to achieve an artistic layout you will love.  There are many ways to do things in Photoshop Elements and this is just one way.  So check it out and let me know what you think.

attitude and style

Kit: Precious  *  Designer: NBK Designs  *  Font: Master of Break  *  Font: TXT Abrasive

so-cool-marquee

The Magic of Beginnings Collaboration at Scrapaneers

The Magic of Beginnings huge digital collaboration has started at Scrapaneers.  For the entire month of December look for a new blog post every Monday, Wednesday, and Friday with tutorials and freebies.  Here’s a preview of this amazing collaboration.

the-magic-of-beginnings-preview


Yesterday, December 2, there was a fantastic tutorial about creating animated GIFs in Photoshop.  Have you ever thought about adding a flashing title to your layout?  This is so cool! Check out Judie’s tutorial here.   In addition to learning a fabulous new technique, you can download Etc by Danyale’s portion of the collab and an Alpha set from Artful Musings.

Free Mini Kit Preview

etc-by-danyale-mini


Free Alpha Set Preview


artful_marqueealpha_preview


GIFs can be created in Photoshop Elements as well.  I created the “So Cool” GIF in PSE15.

recolor-styles-pse

How to Recolor Styles Effectively in Photoshop Elements

How many times have you tried to recolor styles in Photoshop Elements but the result was all wrong?  The color you got wasn’t even close to what you were going for so you decided it wasn’t even possible.  Let me assure you it is!   I’ve written a tutorial on Scrapaneers blog to explain this process and how to get a perfect color match here.  I also have another tutorial using different Styles here.  I also explain what happens if you try to recolor Styles without going through these steps.  I suggest you check out both tutorials for a thorough understanding.  Thanks for looking.

Droplet Drag and Drop Templates

Have you tried the Droplet Drag and Drop templates for PSE15 yet?  They’re so easy you can complete a fabulous layout in five minutes or less.  What?? Yes, that’s right.  I have a new tutorial to show you just how easy it is.  You’re going to love it.  As a bonus, these templates can actually be used in Photoshop Elements versions 10-14 too.  The drag & drop feature was introduced with version 10 but the grouping included with these templates only works in PSE15. But it’s really no problem.  The paper or photo or journal card still resizes automatically and automatically clips to the Frame (photo box).  So check out my tutorial and give them a try!

Styles 101: The Color Overlay Part 2

Learn how to recolor Styles Effects in Styles 101: The Color Overlay Part 2.  Did you think you were stuck with the color selections created by the designer?  Well you are not!  Apply the Styles Effect of your choice then recolor it to match your layout.  Learn how here.

Here’s an example of what you can do.  Draw a shape add a Glass Button Style Effect (any color) then change it to coordinate with your layout.

page15

New Tutorial on How to Adjust the Stroke Effect of a PSE Style

Good morning!  I just posted a new tutorial, How to Adjust the Stroke Effect of a PSE Style.

Adjust Stroke Effect Cover

For this tutorial, I used the Painted Autumn Styles and Painted Autumn Word Strips from Snickerdoodle Designs new kit, Painted Autumn Collection, which released today.

Styles

Painted Autumn Word Strips

Let me warn you, I got a little carried away and included Loading Styles and some other tips for using these Styles.  I hope you find it helpful.

Karen at Snickerdoodle Designs has an excellent sister tutorial using Photoshop here.

Learn How to Use Photo Tiling in MyMemories Suite v6

I remember when photo tiling was first added to MyMemories Suite. I could hardly wait to learn how to do it.  I thought it was the coolest feature ever.  It’s very easy to do and really adds something special to a layout.  I recently wrote a tutorial about using the Group tool.  Photo tiling is one of the effects that uses the Group tool.  Below is a page from the tutorial.  You can find the complete tutorial here.

Grouping Elements Tutorial-010

When grouping animals or people be careful not to chop them up!  That is just not right, lol.  Here’s a page I made quite a while ago.  As you can see, it’s sometimes difficult not to chop off a shoulder or some hair.  Remember, you can always ungroup the photo and tweak the placement of each separate piece. But please don’t split anyone down the middle!

Photo Tiling in My Memories

Landscapes are pretty safe though and look really neat.

Sunrise

Learn How to Group Alphas in MyMemories Suite v6

I often group items in MyMemories Suite to make some tasks easier.  Alphas are one of my favorite things to use.  Some designer’s kits include really cute alphas.  For a long time, I didn’t use them.  One reason was because it took a lot of time and effort to get them all the same size and lined up just right.  But now MyMemories makes it so easy to line them up, space them evenly and then group them.  Once grouped they’re treated like a single element.

Here’s a page from the Grouping Elements tutorial I wrote.  In this section, you’ll learn just how easy it is to align, space, and group alphas.

Grouping Elements Tutorial-012

This is just one of the many things you can do using the Group tool.  You’ll find the complete tutorial here.

I’d love your feedback.  Please comment to let me know if you learned anything new and how you plan on using the Group tool in one of your projects.