Category Archives: Tutorial

Align, Space and Resize Using PaintShop Pro x6

Have you ever wondered how to easily align, evenly space or resize elements in PaintShop Pro x6?  It is very easy and I’m going to show you how.

Aligning in PSP Page 1

Resize & Space Page 2

There is also a Toolbar you can use if that’s your preferred method.

Align Distr Toolbar

As you can see, it’s super easy to align, evenly space & resize multiple items in PaintShop Pro.  This can save a lot of time.  Did you find this tip helpful?  Please comment and let me know what you think.  Thanks!

How to Use Outside Templates in MyMemories Suite v5

One of the most common complaints I hear about MyMemories Suite is that you can’t use outside templates.  That is, templates that are not included as a part of the software.  While it’s true you can’t use them in the traditional way like you would in PaintShop Pro, PhotoShop, PhotoShop Elements or other photo editing software there is a work-around.  You can use them as a sketch.  What that means is you bring the template jpg in as an embellishment then use it as a map for placement of the elements.  As with any template, you can make changes in embellishments or layout as you like.  However, you’re probably using the template because you like the way it looks so I’d be careful about making too many changes.  I’ve made a tutorial to show you how to use a template as a sketch.  You can find it here.  I hope you find it helpful and I encourage any comments and feedback.  Here’s the layout I made using the template.

TemplatesInMMS-011


You can get the template free on Digi Scrapping Freebies Facebook page here.  We encourage you to get the freebie and participate in the challenge at Digi Scrapping Divas here.  Please post your layout in the album for this challenge for all to see.

Take Your Scrapping Skills to a Whole New Level with Art Journaling!

I LOVE art journaling, it is so creative and looks amazing!  It will take you scrapping skills to a whole new level.  In case you’re not sure what I’m talking about I’ve included some examples below of some awesome art journaling techniques.

art journaling

I’ve been looking for a tutorial for quite a while and now I’m so happy to have found a class “The Art of Journaling”.  As you can tell, from the examples above, this is not your everyday, run of the mill journaling.  This is art in and of itself.  So let me tell you more about the class.

art journaling class

Click this link Art of Journaling by Amanda Taylor to register.  This workshop starts March 3. It is actually three classes using Photoshop Elements 10+ or Photoshop CS4+.  It is skill level beginner to intermediate so you don’t need to be an expert in the software but you do need to be familiar with the product.  The workshop starts in 10 days so hurry on over and sign up.  I think it will be a lot of fun and it will definitely be an asset to your scrapbooking layout designs.  If you want to learn journaling as an art form click here.

Finally! Let the My Memories Suite v5 Reviews Begin

My Memories Suite finally released an update to fix the bugs in version 5.  It’s very frustrating because every year My Memories Suite has a new release but they leave it to their customers to identify any problems associated with the release.  In the past I’ve downloaded the new version as soon as it’s available but then I’d have to spend a lot of time working with technical support resolving problems.  So when the new version was released, in November 2013, I resisted the urge to download it immediately.  I read about the issues that others were experiencing and waited for the fixes.

My Memories Suite V5-Available-Now

While I was waiting I couldn’t write any new tutorials.  I knew the software had a whole new look so if I had written any new tutorials they’d be rendered obsolete if only because of the new look.  During that time I couldn’t recommend the software either knowing there were many issues to be resolved.  And since I hadn’t downloaded the new version I couldn’t answer any questions or assist with any problems.  I was very frustrated!

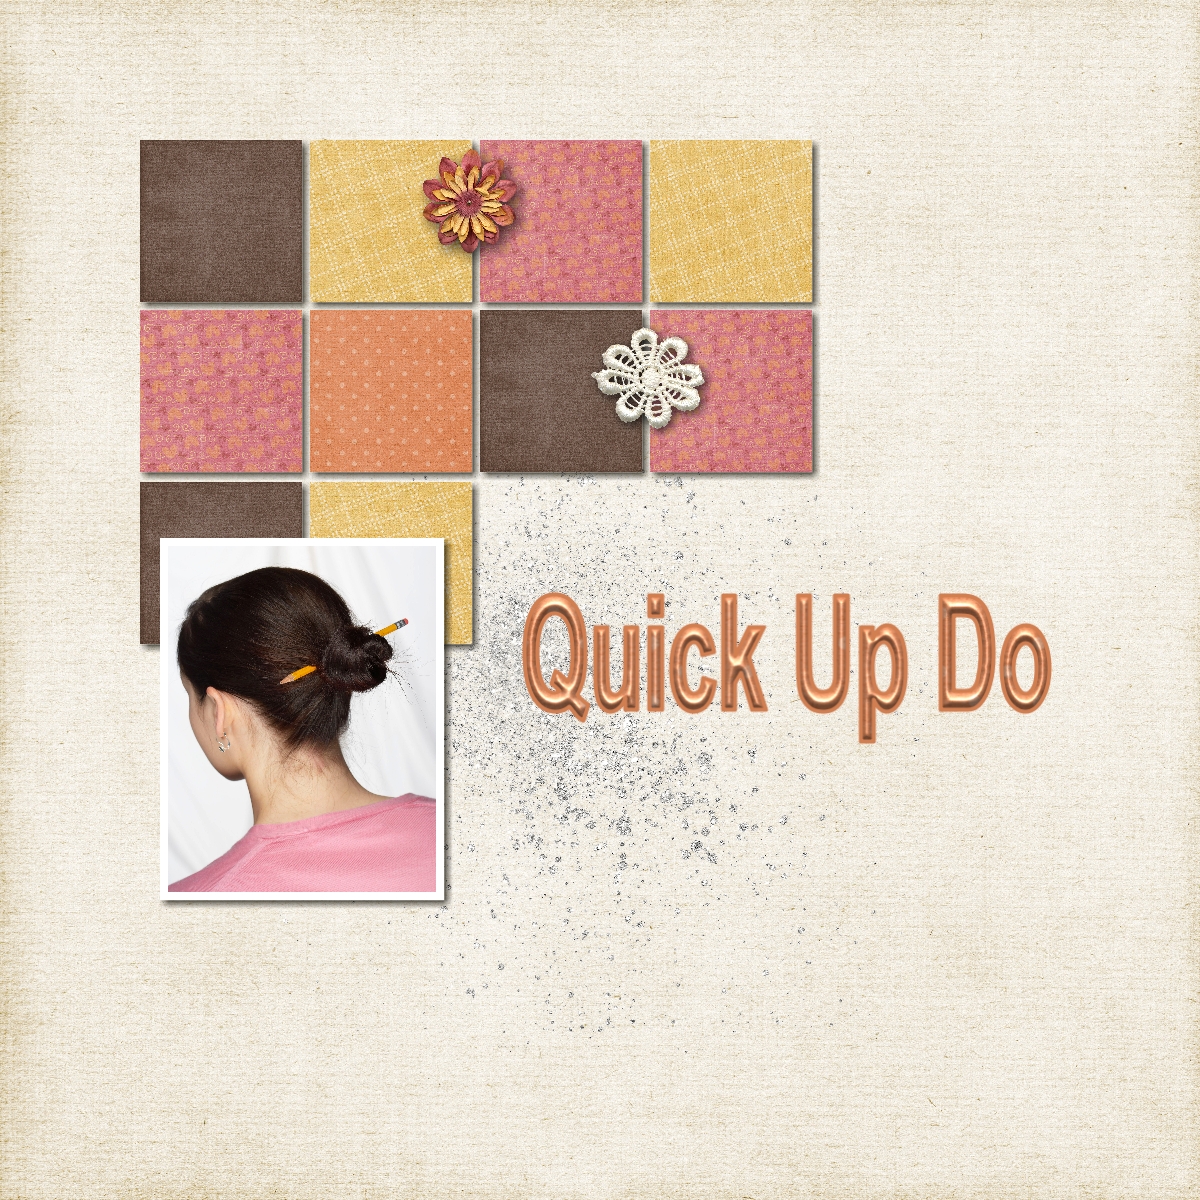
As soon as I heard the update had been released I downloaded the software and started testing it.  I do like the new look and there are some new features I’m looking forward to trying.  In the next few weeks I’ll be working on updating tutorials and reviewing the software.  I’ve already updated one tutorial on color blocking using the photo-tiling feature. There wasn’t much to do since that feature still works the same.  Check out the tutorial here.

Since you can now export pages and albums in pdf format I’m testing that with the color blocking tutorial.  I’d love to know what you think.  Please make comments on this post or on my Facebook page at facebook.com/Scraptious to let me know if you like it or not.

Photo Tiling Tutorial is Now Available

Have you seen any layouts using the photo tiling feature in My Memories Suite?  That is one of my favorite features added in version 4.  If you love the look too, I’ve created a tutorial to show you how to use photo tiling in your layouts.  You can find the tutorial here and I’ve included another example below using this feature.

This example is very similar to one of the layouts in the tutorial but for this layout I used the original photo for the entire background.  I also used the photo effect feature to change it to black & white.

What About Blog Posts-004

How to Remove Guides in My Memories Suite

Would you like to know how to remove the trim guides when you’re working on your scrapbook pages in My Memories Suite?  Personally I find them distracting so I turn them off first before I start working on my layouts.  Here are a couple of ways to do it.

Turn Off Guides

Keep in mind that you don’t want to put text or embellishments close to the edge of your scrapbook page because it might get trimmed or be in the fold when printed.  Before having a scrapbook printed you might want to turn them back on (View> Guides> Trim Area) while you are proofing your album.


Easy Scrapbooking Cut Outs

Wouldn’t you love to know how to cut out letters or shapes when you’re scrapbooking.  I’ll show you how easy it is to make those cut outs and you won’t need expensive photo editing software to do it.  That’s right, it’s easy and free!  Here’s an example of what I’m talking about.  You’ll find the tutorial here.

HowToDoThat-CutOut2

Make Your Own Quickpage

Here’s a question I hear a lot, “How do you make your own quickpage?”.  It’s easier than you think.  Even better, it’s free!  Yes, that right, there is a free online tool that let’s you easily change your layout into a quickpage (QP) fast.  If you would like to learn how to do it, hop on over to my short tutorial here.  You’ll end up with a layout that has a transparent area.  Then just add your photo.  Rotate your photo as needed to fit the hole then send your photo back so that it will be behind the quickpage.  You can then add your title, text or anything else you’d like to the QP.

Quickpage Example

What Makes a Good Album Cover?

What makes a good album cover for the scrapbook you’re making of your honeymoon or family vacation?  I think using one of the photos from your trip works perfectly.  You can add a smaller photo of the happy couple or family, depending on the occasion, to further personalize the album.  If you’re using MyMemories Suite it’s easy to make a title using the same photo that you used for the background.  There is no need for any additional embellishments.   In the end you’ll have a cover that looks professionally designed.

If you’d like to find out how to make an album cover like this check out this short tutorial.