Category Archives: Techniques

Hashtags Tell the Story

Hashtags are still somewhat of a mystery to me but I’ve realized I can use hashtags to tell the story on a scrapbook page.  My husband recently asked me to explain the use of hashtags. I couldn’t really give him a good explanation, because I still don’t really get it myself, but I can use them in a less conventional way that makes sense to me.  Hashtags can say it all.  They can tell the story!

Hashtag Feel the Burn

I love finding new and different ways to tell the story in a layout.  Sometimes a great title is all you need.  I’ve also used titles with subtitles to give a little more information.  One thing I especially like about using hashtags is they also tell a separate story about something that’s popular at a particular time in history.  #hashtags #tellthestory #saymorewithless

Photo-less Layouts

What do you think about photo-less layouts?  I’ve heard people say they haven’t scrapped lately because they don’t have any great photos or they don’t feel inspired.  What about scrapping less than perfect photos or no photos at all?  Sometimes just getting started is the hardest part.

I think layouts without photos are another great way to record everyday life.  When you look at old photos from your parents, grandparents or even great great grandparents do you ever wonder what everyday life was like for them.  Do you wish you had more insight into their thoughts and dreams?  I know I do.

Here are a few ideas for layouts using something besides photos:

  • Inspirational or favorite quotes
  • Favorites lists (a great thing to do each birthday)
  • Funny things your kids say or do (out of the mouth of babes)
  • Facts about someplace you visited
  • Birth statistics
  • Invitations

If you think about yourself and some of the things you wish you knew about your ancestors or things you’d like future generations to remember about you & your immediate family it’s easy.

I love Dr. Seuss and I’ve passed that love down to my son & he’s passed it down to his kids. Dr. Seuss had some profound things to say.  Here’s a layout made with one of my favorite quotes.

Youer Than You quote

A page like this in a family album would bring smiles to some faces and open up conversations about how much we all loved Dr. Seuss.  Add Happy Birthday!  across the top & it would make a very cute birthday card.

Top 5 Shadowing Don'ts

While I consider shadowing a must, there are a few things you don’t want to do.  There are many different type of objects that can be used on a page.  Obviously, I can’t cover every possibility for shadowing but these are some important reminders for the most frequently used items that call for a shadow.

1. DON’T leave things hovering over your page.  Hummingbirds and butterflies may hover but most elements should not.  Doesn’t this row of dots look a bit odd?  Too much of a shadow makes elements look like they’re floating above your page.

floating

2. DON’T leave them off the page either.  A layout without shadows will appear flat and lack dimension but the right amount will enhance your page.

Flat

3. DON’T shadow text, splatters or imprints since they’re not usually ‘thick’ enough to cast a shadow.  These things look all wrong when shadows are added, you may even think you’re having double vision!

Double Vision

4. DON’T forget where your ‘light source’ is coming from.  When I’m working on a layout my lamp is over my left shoulder.  This helps me remember where my ‘light source’ is.  it’s a confusing mess when shadows go every which a way!

Every Which Way


5. DON’T forget you are trying to make your layout look as realistic as a traditional page.  It’s even better than a traditional layout.  It looks great but lies flat when printed and you don’t have all the mess to clean up when you’re done.  Have fun!


Top 5 Shadowing Do's

Shadowing is very important on your digital scrapbook layout to achieve a more realistic look.  Shadows add depth and dimension to an otherwise flat design.  If you’re making a traditional paper layout, shadows are ‘built in’.  Since the elements are truly dimensional they automatically cast shadows.  That makes sense, right?  When creating digital layouts you should try to add realistic looking shadows.

Here is my list of the top 5 DO’s when adding shadows to your digital designs.

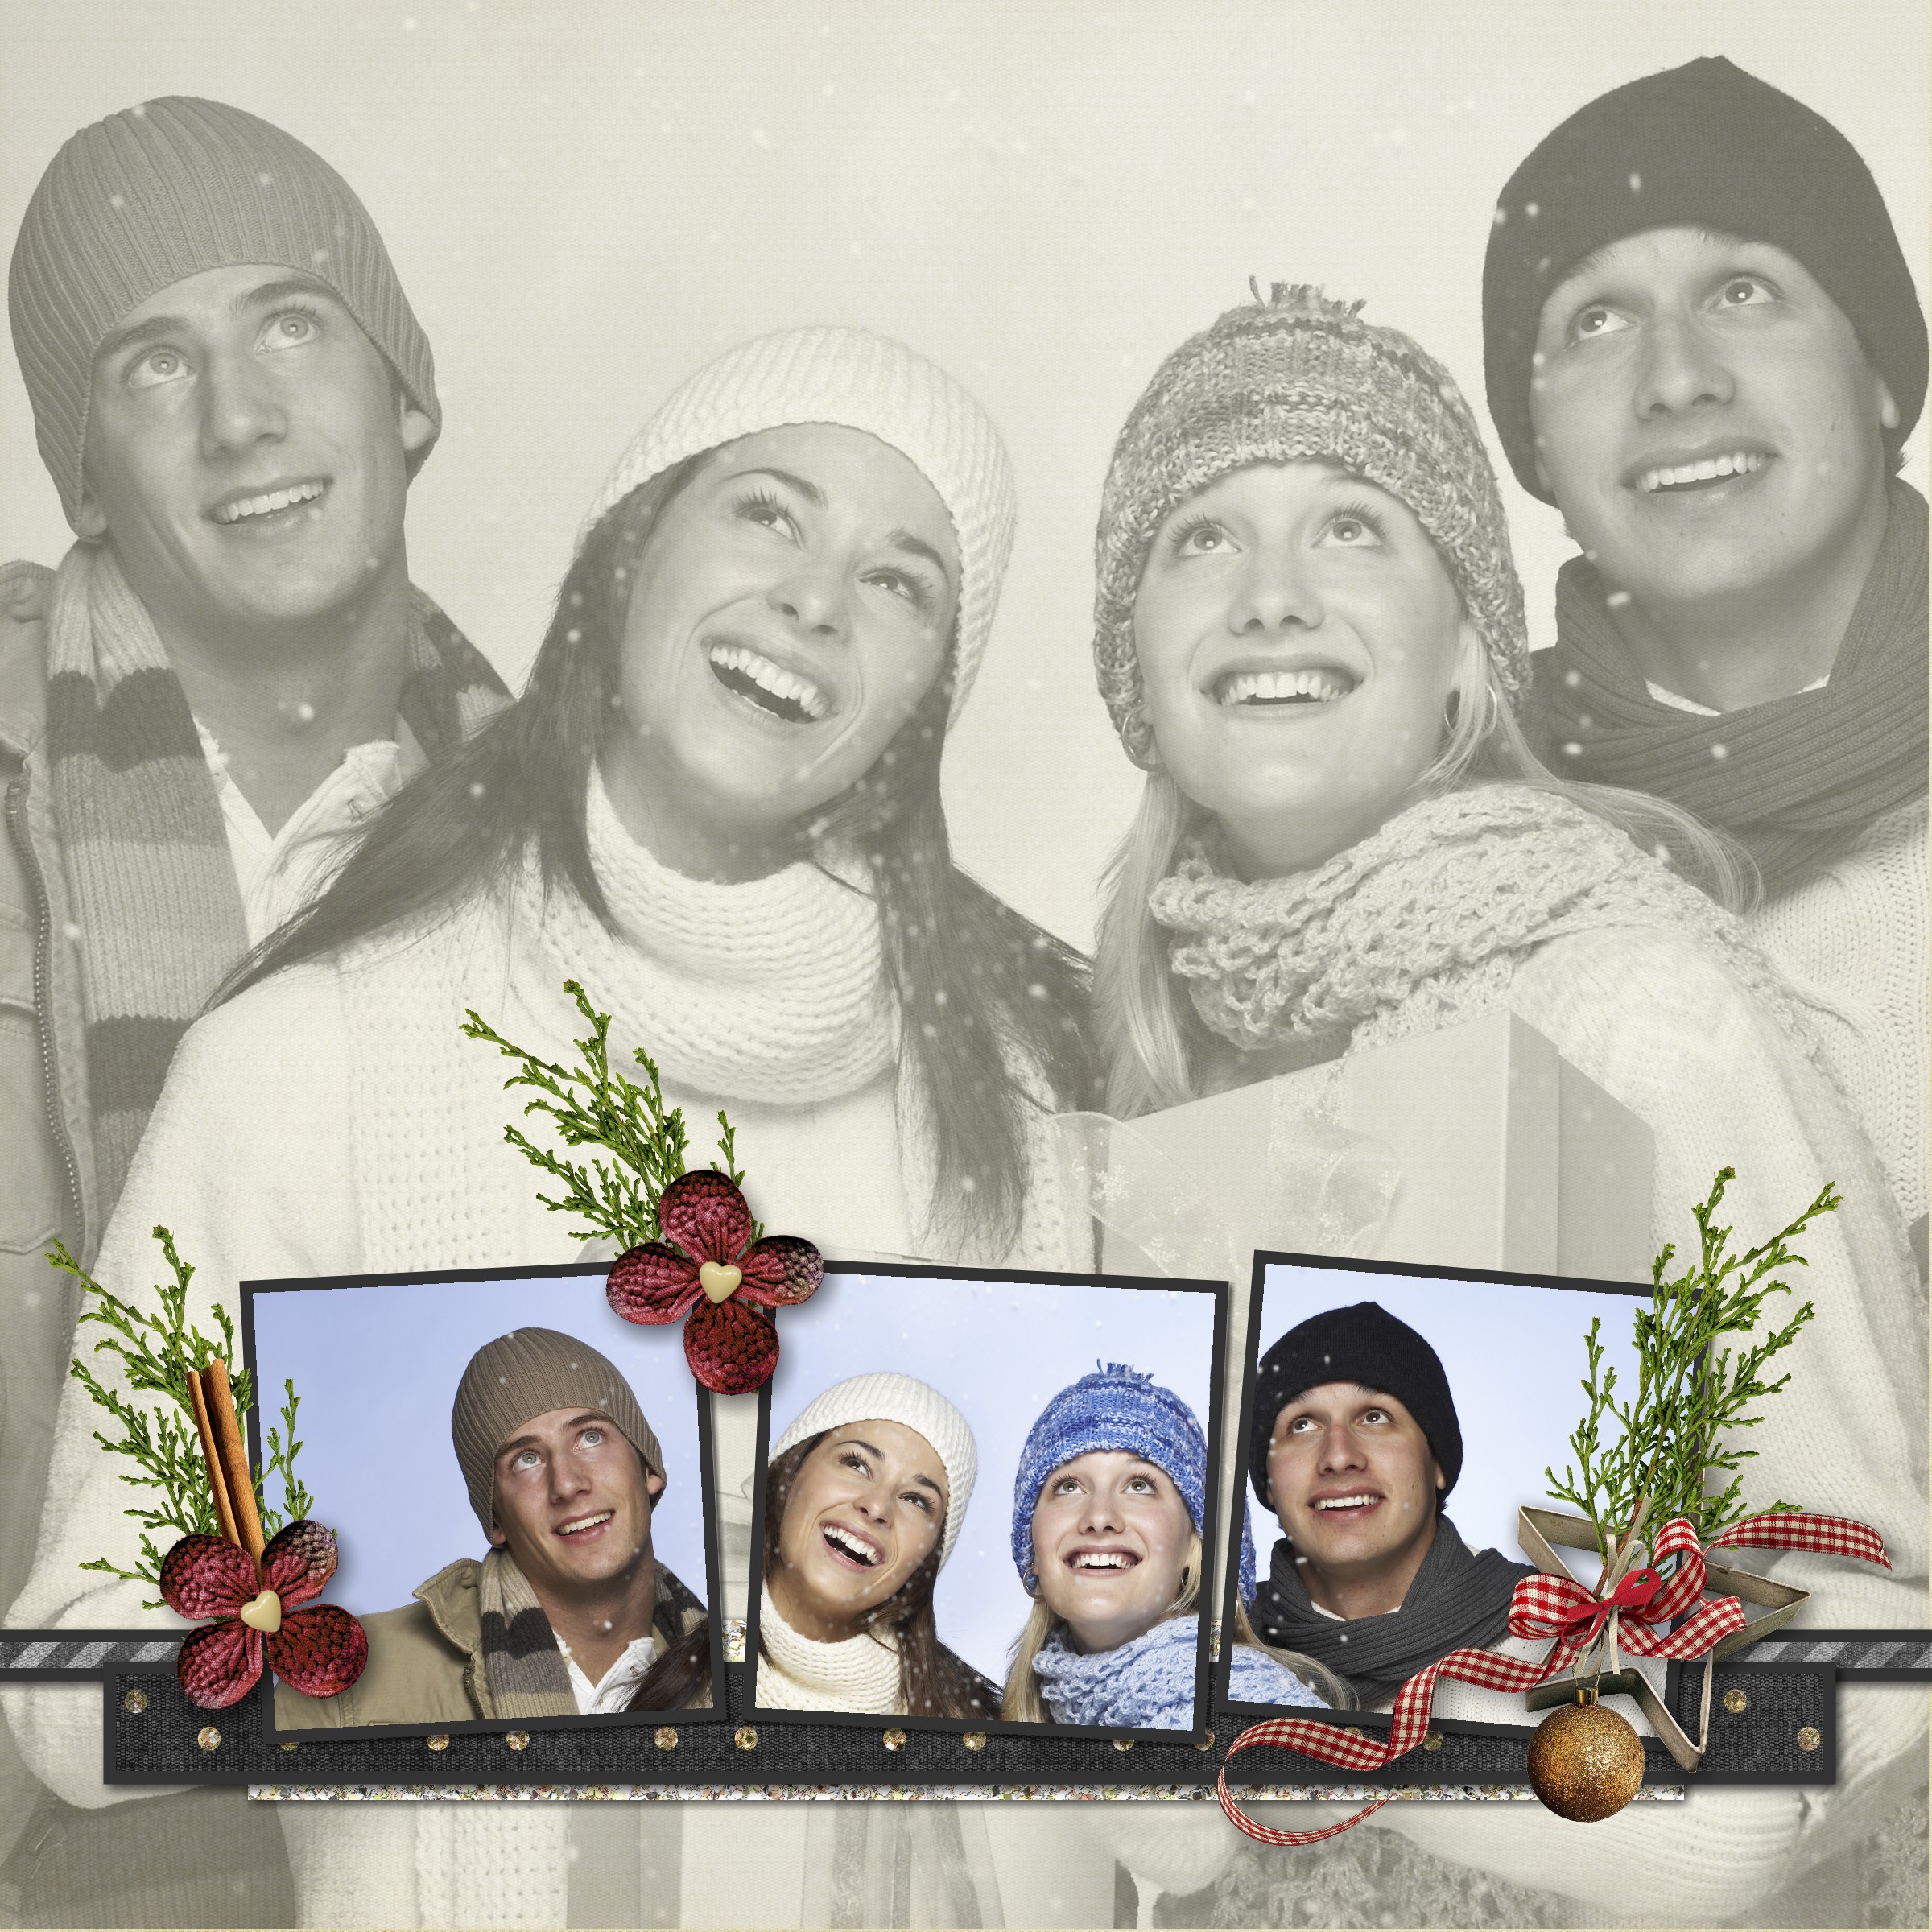
1. DO consider how ‘thick’ an element is & how much shadow it would cast if it were ‘real’.  Paper & card stock don’t cast the same shadow as ribbon, buttons or flowers.  The photo below demonstrates how shadows are cast naturally for items of various thicknesses.

Various Depth Items

2. DO think about your ‘light source’ and cast the shadow away from it.  If light is coming from above & to the left the shadow will fall below & to the right.  The photo above is a perfect example of this.

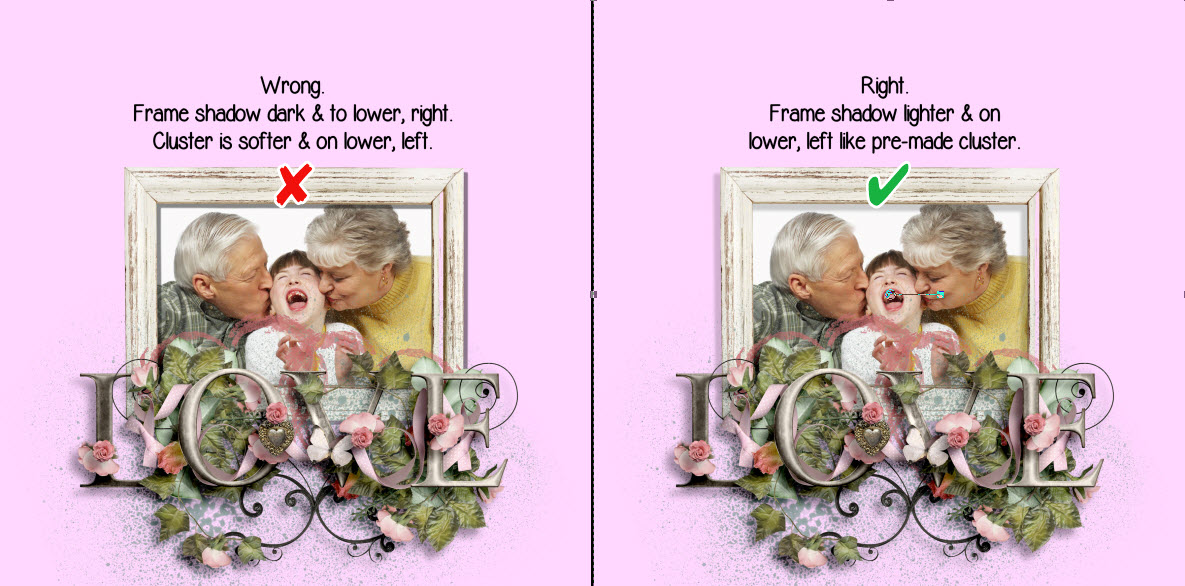
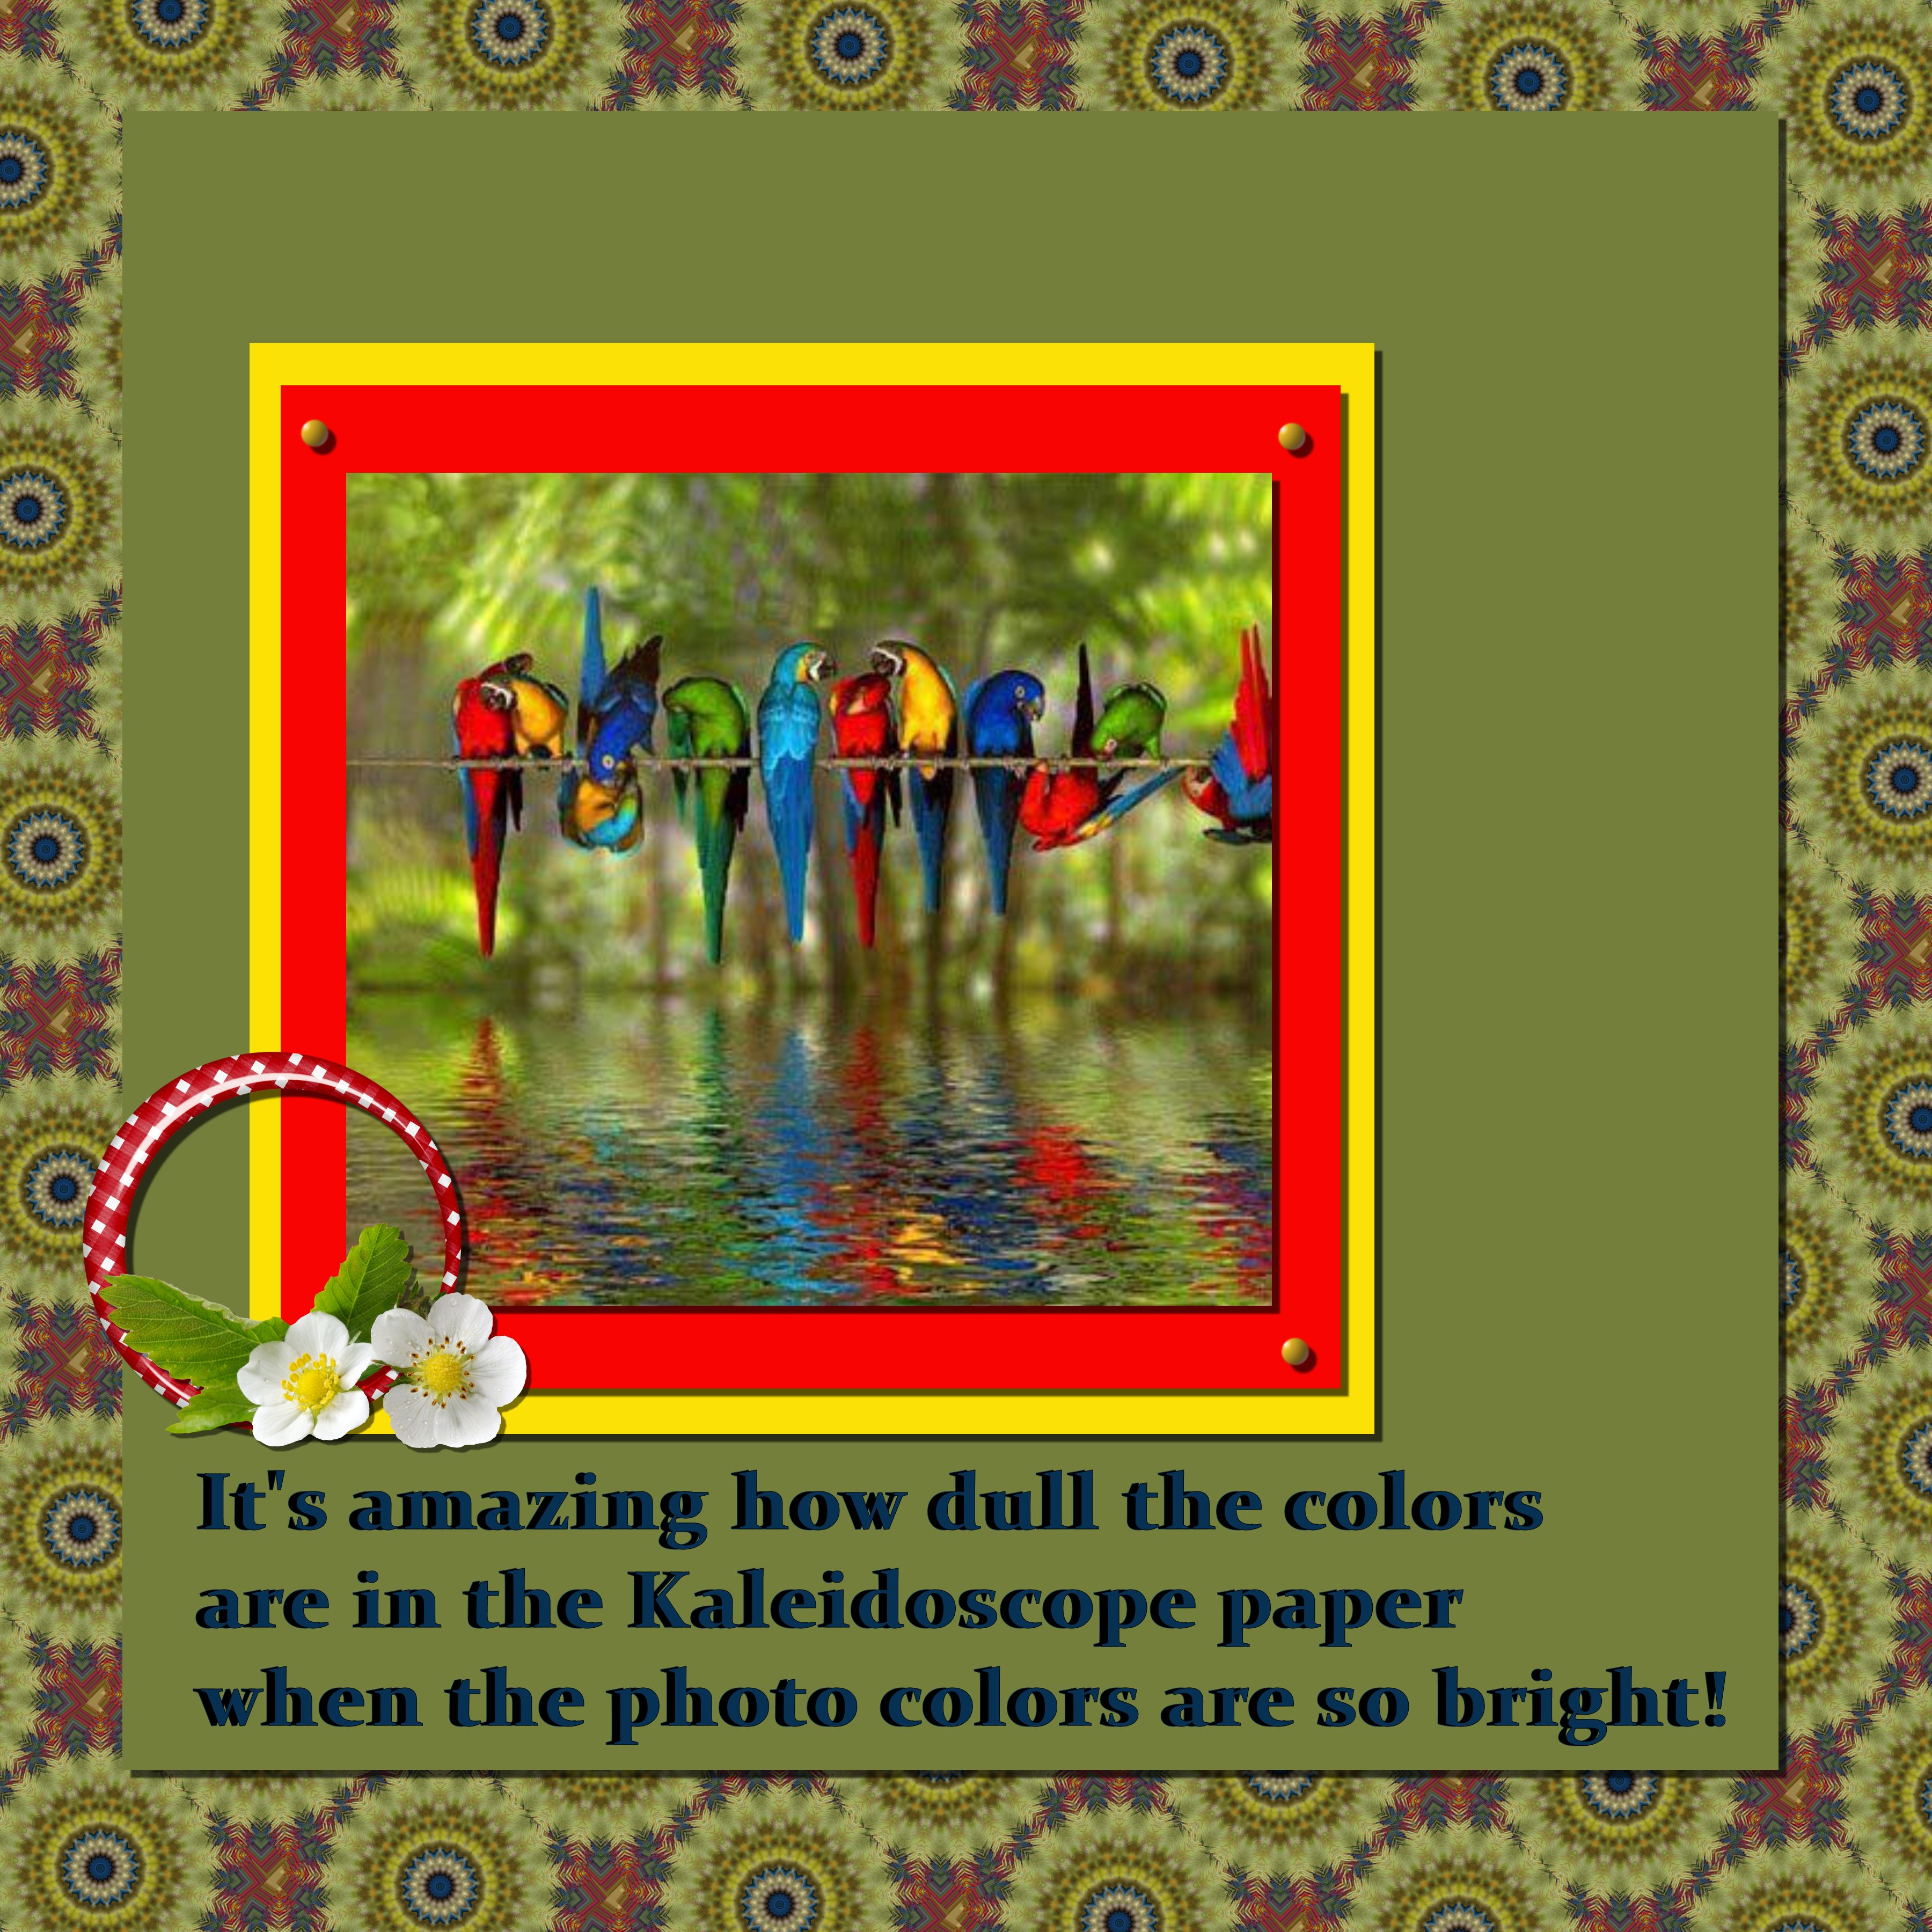
3. DO match the shadow direction for all elements on the layout.  Tip: If you’re using a pre-made, pre-shadowed cluster try to match the shadowing on any other elements you add. In the photos below I used a pre-made pre-shadowed cluster.  Most people tend to shadow to the right & below but the cluster was pre-shadowed to the left & below.  The shadow for the frame looks much better on the right example.  The frame shadow is slightly darker because it is closer to the page than the cluster.

Wrong vs Right

4. DO remember the thicker the element, the lower the opacity should be.  A lower opacity makes shadows more transparent.  Notice in the above example you can see the splatter below the cluster, through the shadow, because the lower opacity makes it transparent.

5. DO raise the blur setting for ‘thicker’ elements.  This will create a lighter, less defined shadow.  Thinner elements shadow will be darker and more defined.

I hope these top 5 shadowing do’s are helpful.  Stay tuned for some shadowing dont’s I’ll be posting in a couple of days.  What do you think?  Do you agree?  Your comments are welcome.


Take Your Scrapping Skills to a Whole New Level with Art Journaling!

I LOVE art journaling, it is so creative and looks amazing!  It will take you scrapping skills to a whole new level.  In case you’re not sure what I’m talking about I’ve included some examples below of some awesome art journaling techniques.

art journaling

I’ve been looking for a tutorial for quite a while and now I’m so happy to have found a class “The Art of Journaling”.  As you can tell, from the examples above, this is not your everyday, run of the mill journaling.  This is art in and of itself.  So let me tell you more about the class.

art journaling class

Click this link Art of Journaling by Amanda Taylor to register.  This workshop starts March 3. It is actually three classes using Photoshop Elements 10+ or Photoshop CS4+.  It is skill level beginner to intermediate so you don’t need to be an expert in the software but you do need to be familiar with the product.  The workshop starts in 10 days so hurry on over and sign up.  I think it will be a lot of fun and it will definitely be an asset to your scrapbooking layout designs.  If you want to learn journaling as an art form click here.

Photo Tiling Tutorial is Now Available

Have you seen any layouts using the photo tiling feature in My Memories Suite?  That is one of my favorite features added in version 4.  If you love the look too, I’ve created a tutorial to show you how to use photo tiling in your layouts.  You can find the tutorial here and I’ve included another example below using this feature.

This example is very similar to one of the layouts in the tutorial but for this layout I used the original photo for the entire background.  I also used the photo effect feature to change it to black & white.

What About Blog Posts-004

What About Close-Ups?

What about Close-ups?  I love them!  Digital cameras, and even cell phone cameras, have come a long way since their inception.  These fantastic cameras make it easy to snap tons of photos.  The quality has improved so much you can zoom in on those great shots to get fantastic close-ups.

When you use a very large close-up in your layout you may not need a lot of embellishments but by strategically placing them you can enhance the overall look.

In the example below, I used a picture I took today of our Mini-Schnauzer Sweetie.  She loves to hunt grasshoppers!  I was hoping to get several in a series of hunting shots but one got away and she was off to catch it.  But I love this shot!  The playful feel & muted, minimal embellishments enhance the pic while leaving room for the title “Hunting Grasshoppers”.  So keep going for that great shot, enlarge and crop it.  Close-ups are winners every time!

Hunting GrasshopperCredits: I used layout sketch #6 in my Kindle eBook “Scrapbook Layout Sketches-Volume 2”.  Click the image below to get the book.  The kit is One Fine Day by Kimeric Kreations.  Word Art Dancing Script and TXT Abrasive.

Kaleidoscope Effect

Yesterday the word of the day was kaleidoscope on Digi Scrapping Divas Facebook page.  This month we’ve focused more on techniques and effects for inspiration.  I think it’s a fun twist on the daily challenges.  It is very curious how bright colors are unrecognizable once the kaleidoscope effect is applied.  In the example below, I used the bright bird picture to make the kaleidoscope background paper which turned out so different you’d never guess what the source was.

Kaleidoscope

Easy Scrapbooking Cut Outs

Wouldn’t you love to know how to cut out letters or shapes when you’re scrapbooking.  I’ll show you how easy it is to make those cut outs and you won’t need expensive photo editing software to do it.  That’s right, it’s easy and free!  Here’s an example of what I’m talking about.  You’ll find the tutorial here.

HowToDoThat-CutOut2

Make Your Own Quickpage

Here’s a question I hear a lot, “How do you make your own quickpage?”.  It’s easier than you think.  Even better, it’s free!  Yes, that right, there is a free online tool that let’s you easily change your layout into a quickpage (QP) fast.  If you would like to learn how to do it, hop on over to my short tutorial here.  You’ll end up with a layout that has a transparent area.  Then just add your photo.  Rotate your photo as needed to fit the hole then send your photo back so that it will be behind the quickpage.  You can then add your title, text or anything else you’d like to the QP.

Quickpage Example